Getting Warmed Up, From Front To Back, This Fall
Your warm-up should do just that – gently prepare the body for exercise by gradually increasing your heart rate and circulation. This will loosen the joints and increase blood flow to the muscles, prepping your body and mind for physical activity. Just how we keep your mind and muscles constantly guessing in class by switching up the exercises, we do the same at the start of class in our quarterly warm-ups. Let’s break down the current warm-up release, shall we?
Did you know your core has two sides? We want you to keep your entire core engaged this warm-up, so think about working both the back and front side of your abdominal wall. The key to mastering the first few moves of class is your breath control. Starting with your breathing is a great connection for mind and body, throughout class. With every inhale, imagine the belly button is pulling in towards the floor, and with each exhale, try to pull in even deeper, focusing on your transverse abdominals. Keep your shoulders wide and roll your shoulder blades down your back, maintaining the isometric contraction of your core throughout each move. The pumping of your arms also helps get the blood moving in the body, bonus!
Think of the next four-count ab move, “reach, roll, twist, extend” as a jazz-hands version of the original and aforementioned arm pump. It’s still all about breath control and a deeper contraction in your core, with a little more pizzaz (wink). Your number one goal is to keep your belly flat by squeezing your navel in and scooping your belly out with every exhalation. Think about working deeper and smaller over time, versus starting over with every set, exhaling on the reach and the tap. Your number one goal in class is always muscle engagement over a large scale of motion.
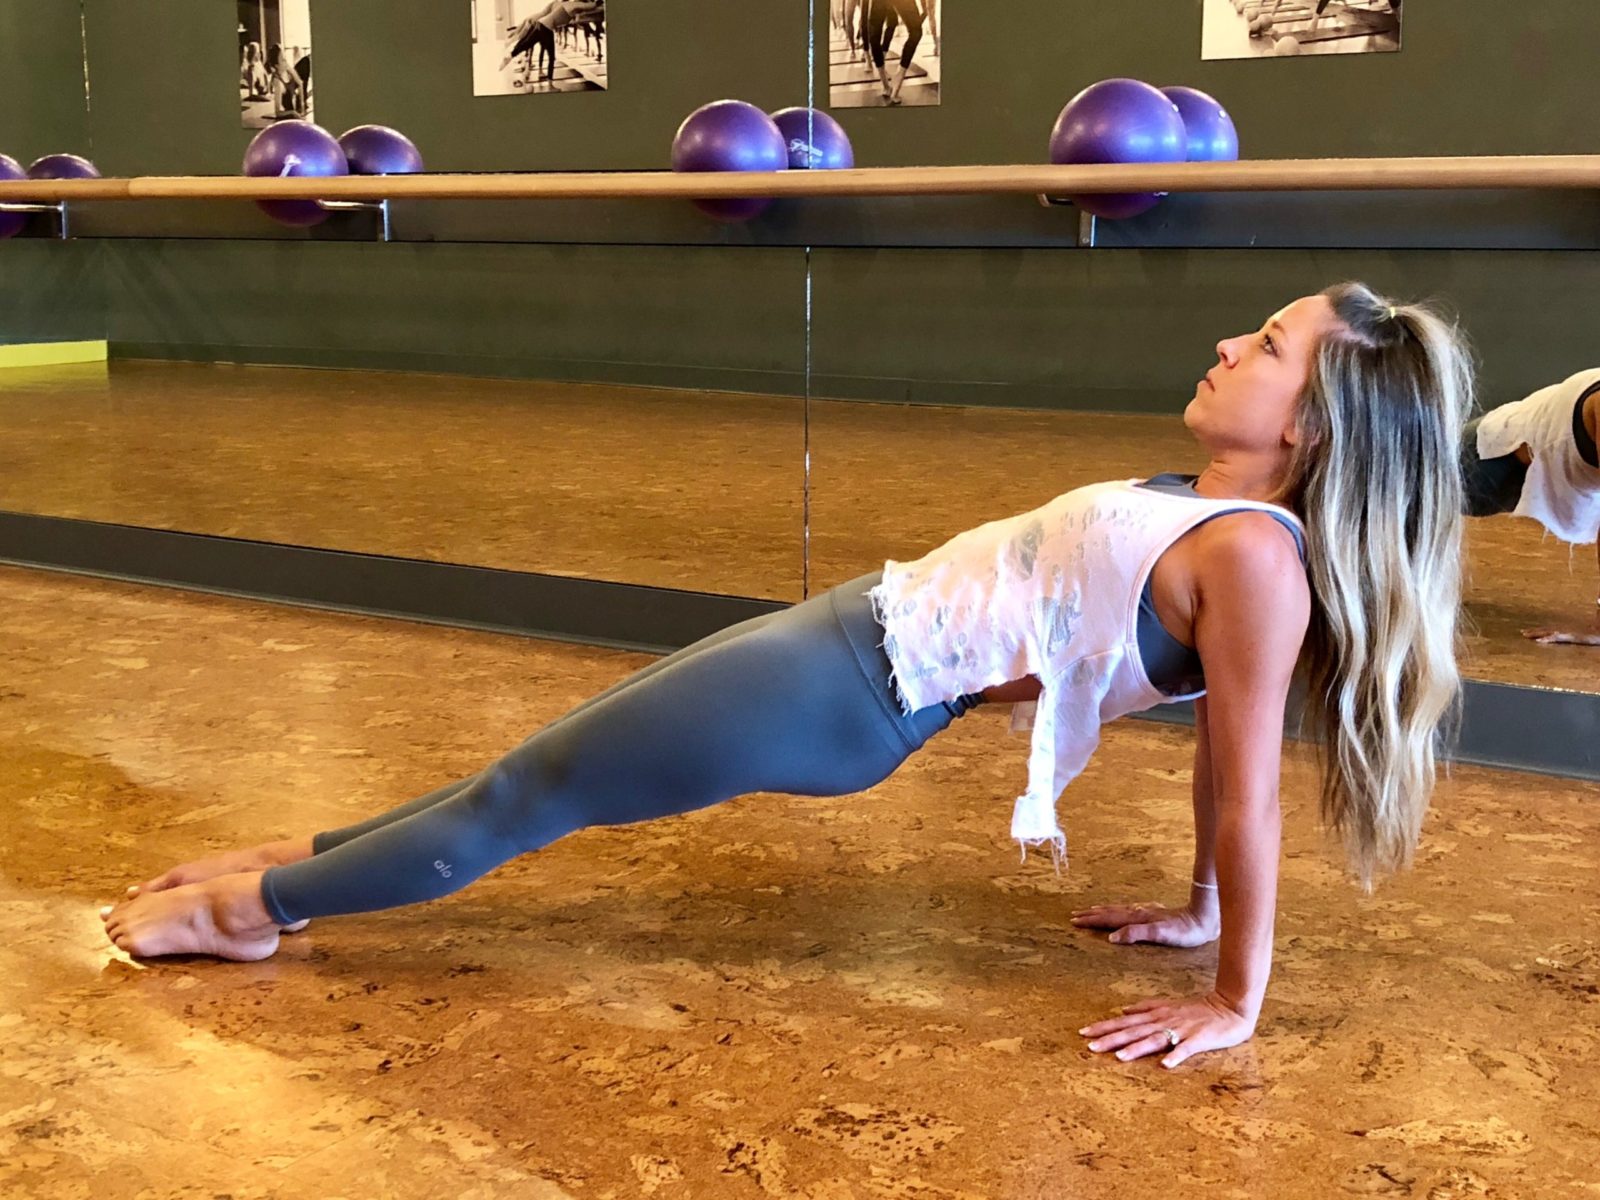
Moving onto reverse planks, otherwise known as the hardest, but most effective(!), plank on the planet. Think about driving your heels and palms into the ground, and staying in control during the drop. When you start to feel your weight move into your lower back, that’s your signal to bridge yourself back up. That should be considered your lowest point in this plank. If you have wrist sensitivity, or generally want a little less intensity for this move, try performing a static hold instead, or lowering yourself down onto your forearms.
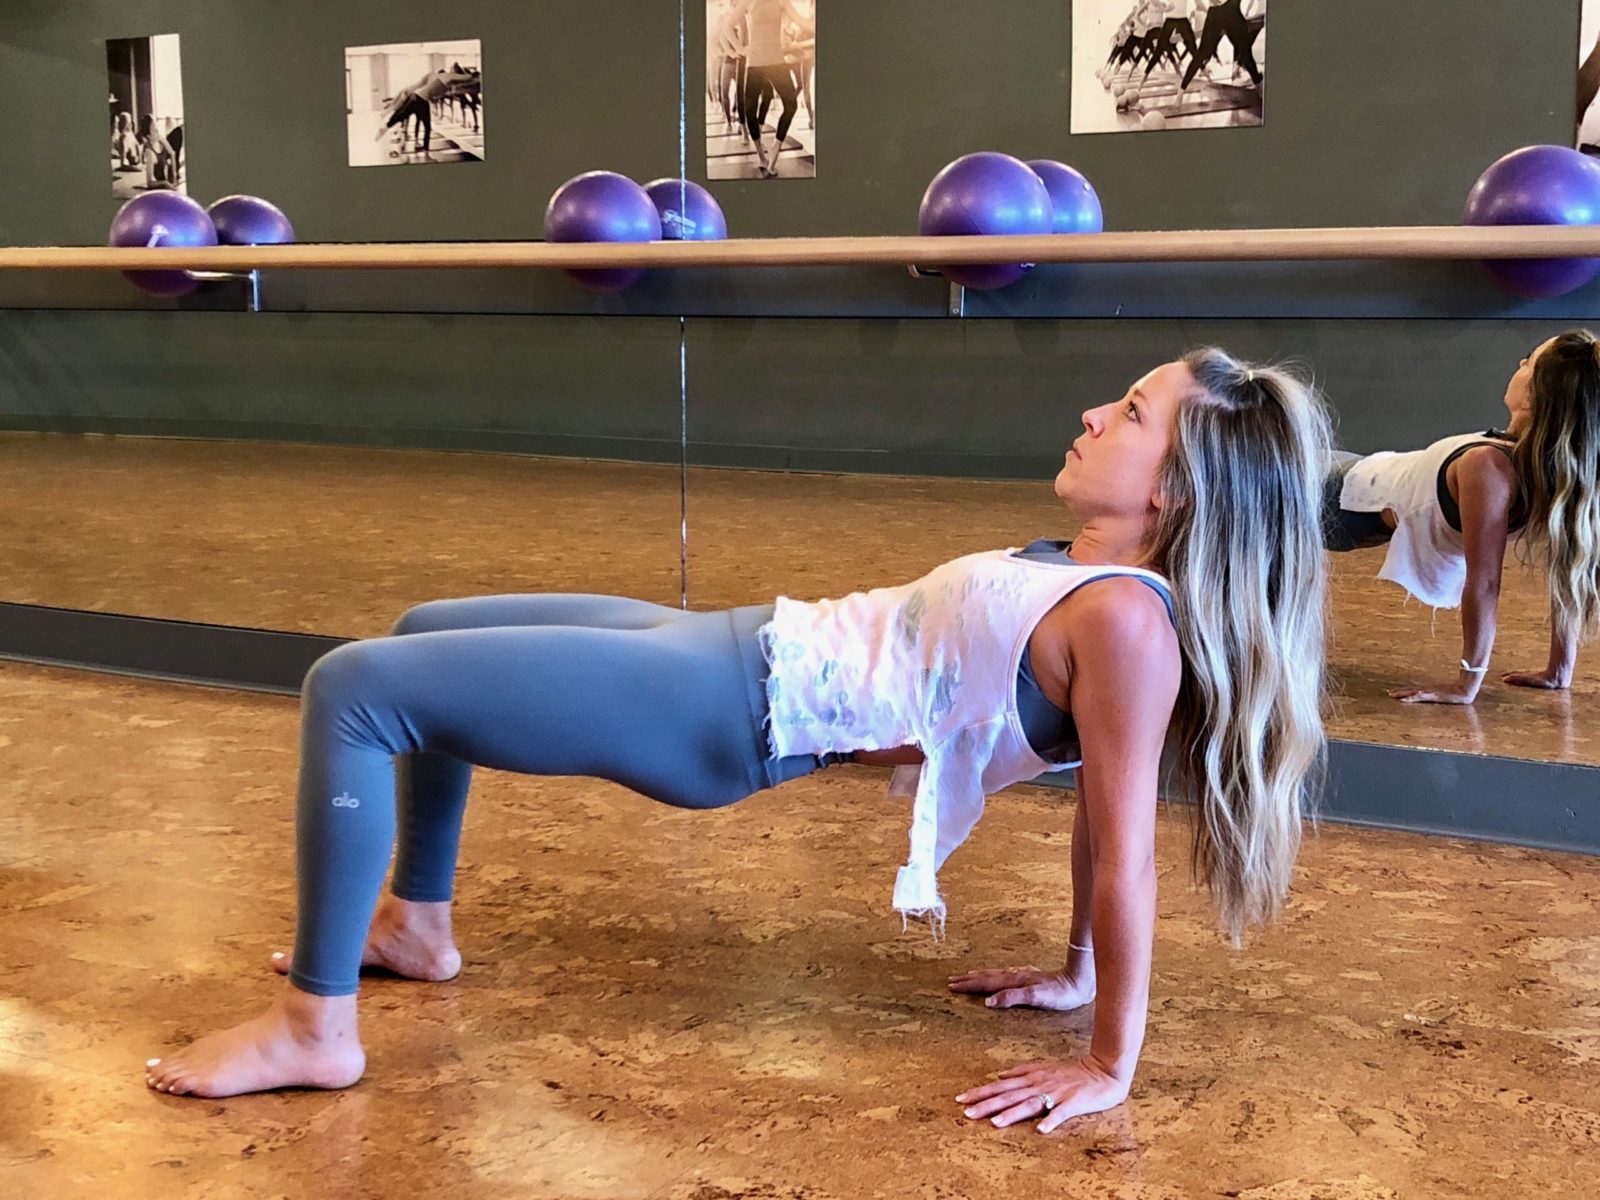
When working out your triceps, you want to keep as much weight pulling behind your body as possible. Most of the time people lead with their hips, versus their arms. Our bridged reverse tricep push up is a great way to make the mind-body connection to actually dip from the elbow and not your hips. Elbows should shoot straight back, with your hands and feet planted, and hips raised the entire time. You want to think about engaging the muscles in your back to bridge your hips up, pressing yourself away from the floor. Make sure when you lower your seat to finish, that you focus more on stretching your seat back allll the way back, so your weight rocks into the heels of your hands. You’re not tapping your seat up and down during these small isometric dips. If you don’t feel this in the backs of your arms in this position, try seated dips instead to master isolating your triceps first!
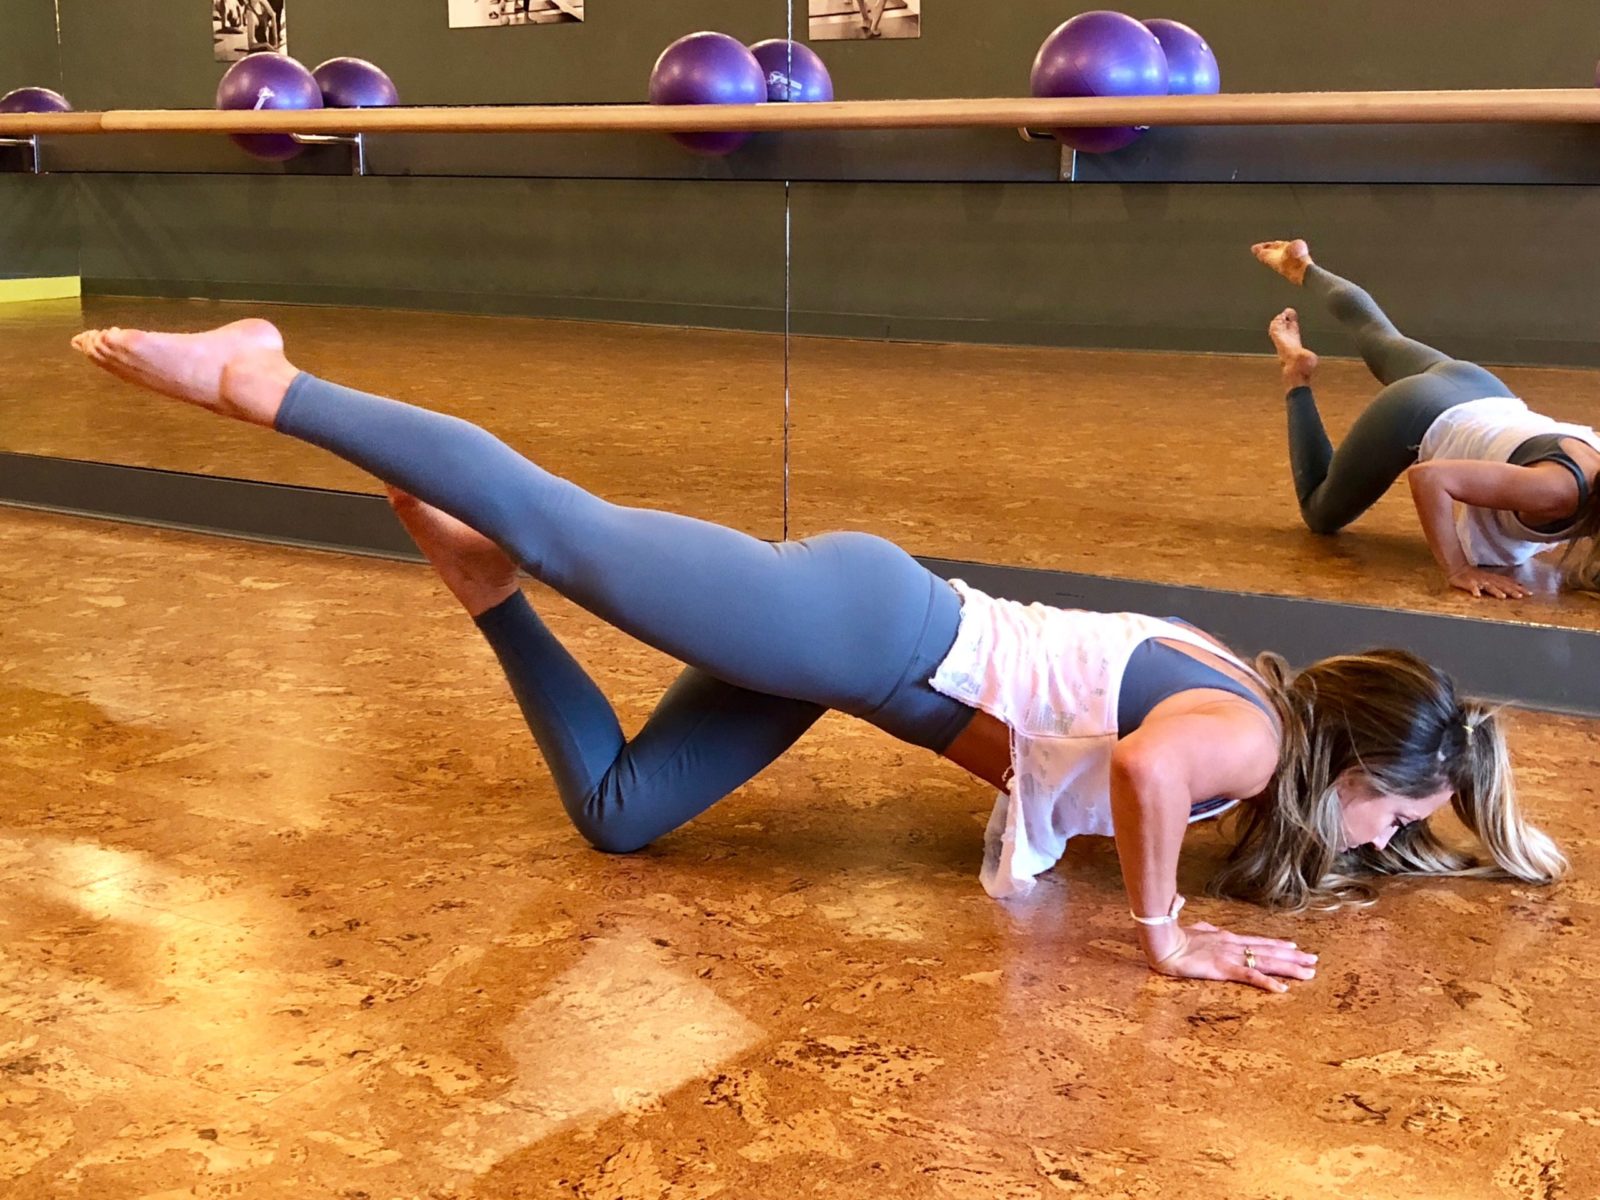
Push ups are usually generally performed on our knees, or in a modified position in class. But we’re really challenging you to add leg raises, and even pop onto your toes, for this current warm-up. Keep in mind when you are raising each leg, to keep your body weight centered, meaning you’re not favoring one side of your body over the other. A good check-point for yourself is to see if your shoulders and hips remain level throughout the exercise. When you pop onto your toes to finish your push up series, use the mirrors around the room to check and see when your form is compromised. If you can’t remove the small sway from your lower back, it’s time to lower your knees so you can really scoop out your abs and re-center. Remember you’re using your own body weight on the way down, powering through the floor on the way up, and always leading with your chest (not hips)!
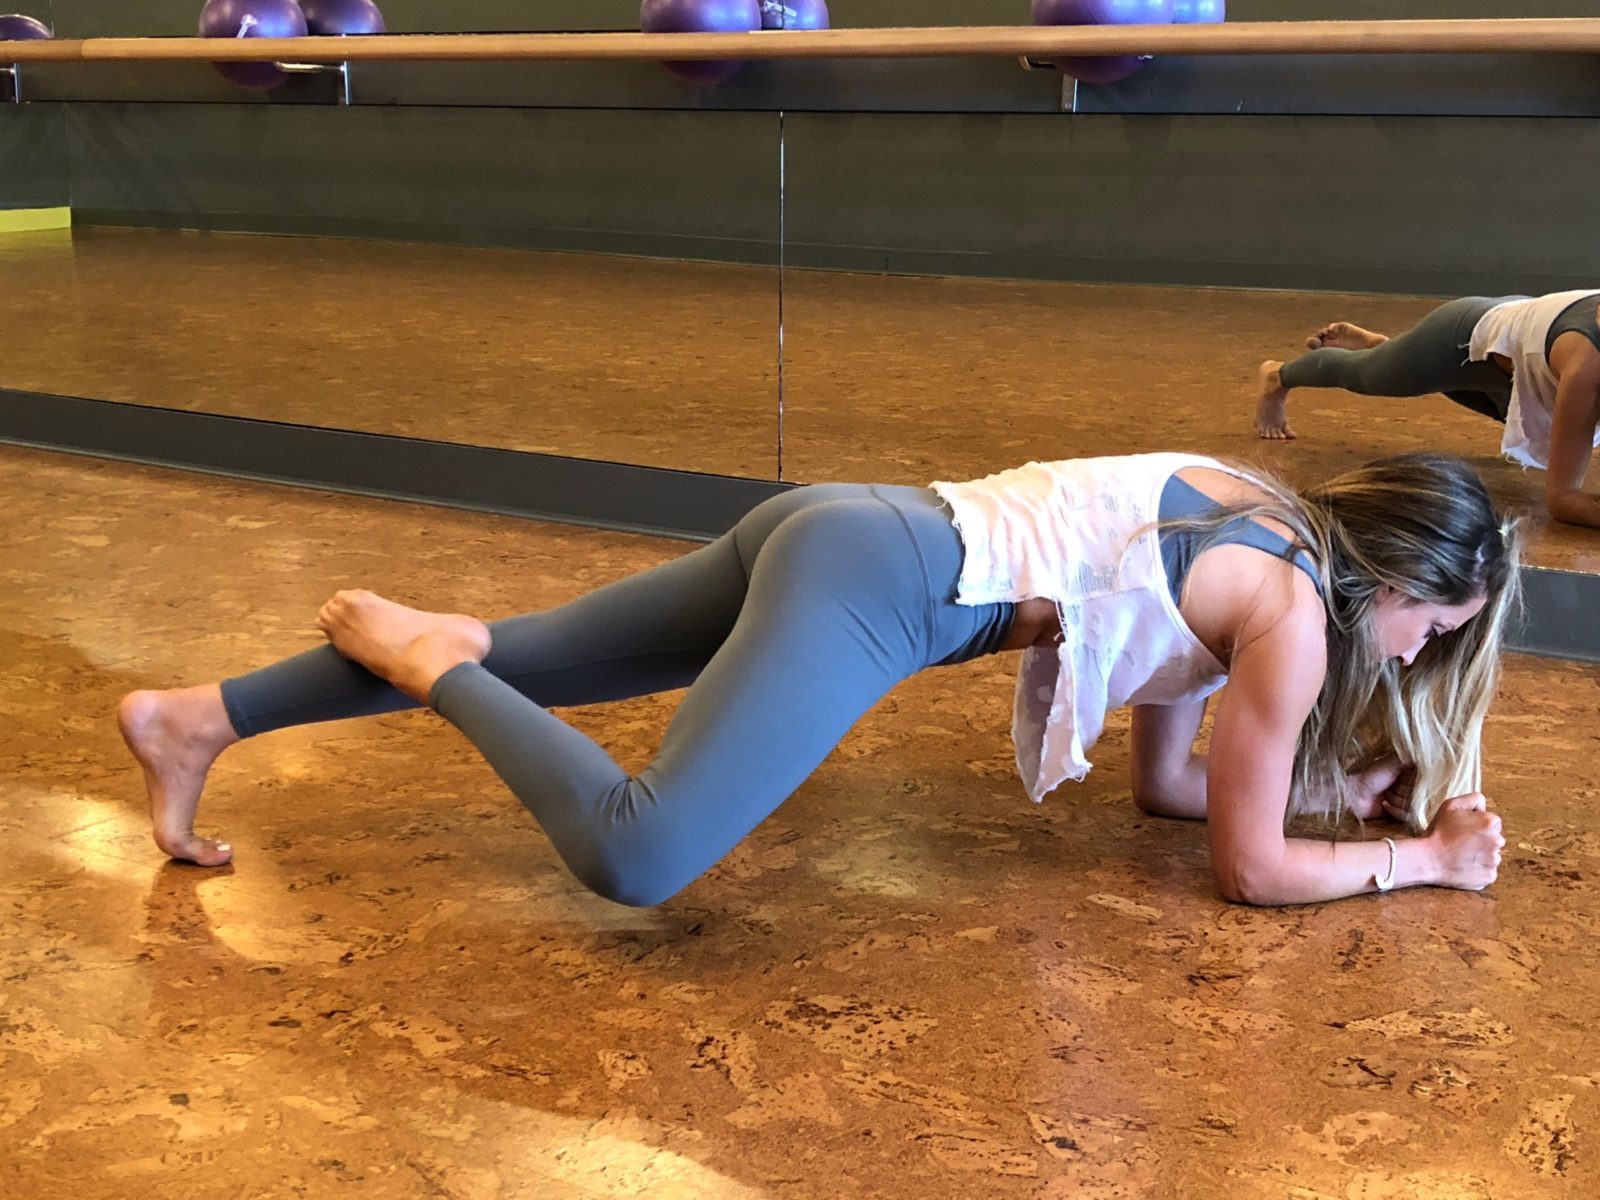
We’ve made it to our last floor exercise before you start your weighted arm work, woo hoo! The plank is credited with working the entire body, and that’s what we want you to think about when performing the rolling plank in class. Let’s not complicate this move, as you seriously don’t need to be coordinated to pull it off, promise! Think of your bent leg as never losing it’s shape. It’s starting in a kick-stand behind your body for the side plank. That leg crosses behind as you lift your body back over to your forearm plank (think figure-4 leg cross), then take it back to your starting side-plank. Think about keeping your hips at the same height the entire time to ensure the work stays in your core and out of your back. If this still feels a little too much like rubbing your belly and patting your head at the same time (no judgement), just hold the kick-stand side plank and lower and lift your hips instead. We finish off planks by threading our floating leg through (think reach forward for the edge of your mat) to find a true isometric lift to finish. By straightening that bottom leg out, and forward, you’re removing the gap of space for your hips to drop down to keep the work centered in your core, from front to back. It’s actually just better form, not crazy hard, we promise!
Now that your feeling warm and limber, and a little out of breath, it’s time to pick up the intensity with your dumbbells. Stay tuned for a later blog post about our weighted arm work. We hope that you use these tips for your next warm-up in class, and remember to always ask your instructor if you’re pre-or-post-natal, dealing with an injury, or if something just simply doesn’t feel right, for alternate moves and positions to better suit you!


